
On most roofs, gutters are held in place by fascia boards. This is so that the gutters have a stable and accessible surface to be attached to. When you need to adjust the gutters, they are straightforward to reach and repair. However, some homes still require the installation of gutters even though they lack fascia boards.
Fortunately, you can still install gutters on your roof without a fascia board by utilizing roof straps. These are metal or other suitable material lengths fastened to the roof and the gutter on opposite ends. In this manner, the roof directly supports the weight of the gutters.
Although installing roof gutters is more complex than it first appears, it is nevertheless possible to do so safely so that they can support gutters all around the home.
While I outline the methods below, always seek the help of a professional to avoid doing more harm to the roof than necessary. Do all people, therefore, require gutters? Yes, with specific exemptions.
How to install gutters without fascia boards
For this procedure, you need a pop rivet gun, ladder, cordless drill, offset tin snips, gutter sealant, elbows, 1/8-inch medium-length rivets, 1¼-inch self-tapping head screws, duckbill tin snips, measuring tape, hex head driver, crimper, gutter flashing, gutter hanging strap, downspouts, ¼-inch hex head screws, and roof straps.
The procedure is as follows:
- Determine the size of the house and mark the locations of any downspouts and other gutter-related elements. The size of the gutter system you want and the home’s actual square footage determine this.
- With the aid of the tin snips, cut the gutters to the required lengths based on the measurements you would have obtained in the previous step. Cut carefully to prevent leaving too little space between joints, which might cause leaks. You can use gutter expansion joints instead.
- Use the tin snips to notch the gutter parts so they may be joined together more efficiently.
- Use gutter sealing at least 1/2 inch from the edges to help join the sections together. Using the notches you made in the previous steps, you can quickly snap them into place. As a result, the joint is stable, and the sealant creates the necessary waterproof seal to stop leaks.
- You then use rivet guns to insert the rivets after drilling holes at least 1/8 of an inch deep at the front of the gutter. To create a strong junction, rivet each piece that is attached.
- Add caulking using gutter sealant over each rivet and the joints for a waterproof seal.
- Before climbing the ladder with the gutters, assemble them while still on the ground.
- Use the offset tin snips to cut the outlet hole after marking the portions with the downspout outlet. About 1/16th of an inch should separate this from the outside line.
- Rivet the outlet into the hole using the 1/8-inch-diameter pre-drilled holes.
- Measure the slope to ensure that water flows toward the downspouts and not away from them. To prevent losing it, mark this slope on the area beneath the roofing materials. If done correctly, you can avoid damage to the roof.
- Gutter straps should be attached to the roof. You will require at least two ladders spaced apart to assist two persons in carrying the gutters to the roof, given that you will be climbing the ladder while holding the pre-assembled gutters in your hands.
- You should install gutter flashing to prevent water from backing up behind the gutters. Install the flushing beneath the shingles to keep water and ice off the roof.
- Add the elbows to the downspouts for water collecting to complete the installation. You can then direct the downspouts in the direction you want.
- Finally, to support the gutters, fasten the roof straps to the roof at specific locations. Since this stage includes causing the shingles to move, you must proceed cautiously. The water should always be pointed away from the house. It’s challenging to install gutters without a fascia board, especially when working with shingles on the roof.
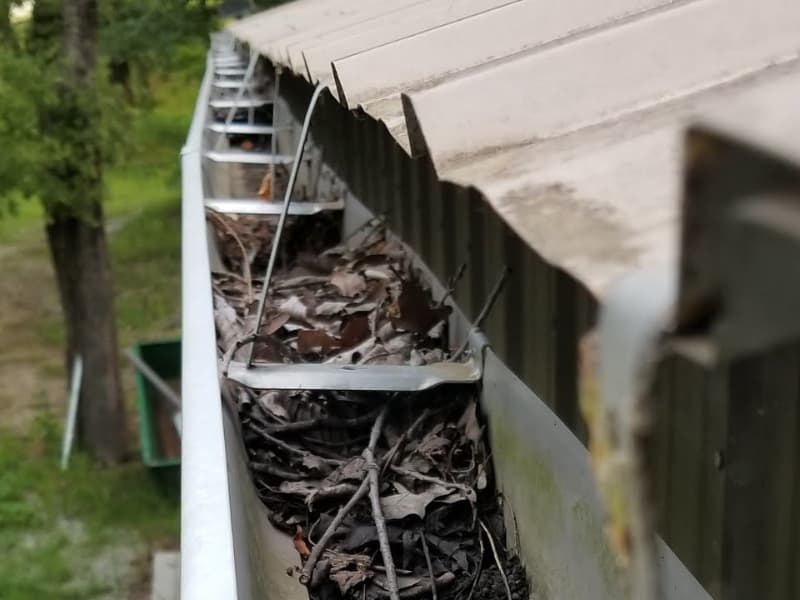
Keep gutters clean by removing tiger stripes and other types of dirt from them. This helps keep them in good condition for longer.
What are fascia boards?
The word “fascia” is derived from the Latin word for “band or strip of material.” Like your body muscles, fascia forms a protective sheath around them; fascia is used in building.
On the other hand, the fascia around your home is essentially a horizontal board that hides the exposed roof rafters or trusses where the walls meet the rooftop.
Given that gutters sometimes obscure the fascia on homes, many homeowners are unaware that it even exists.
Do I need gutters on my roof?
Rain gutters are important parts of the house. Although they might be a beautiful ornamental addition to your house, their primary function is to stop water damage such as mold and mildew.
They also divert rainwater away from your siding and foundation by gutters, which help maintain the integrity of your house.
Without gutters, water runoff can accumulate around your house, seep into your foundation, and eventually result in water damage.
In addition, if channels are not regularly cleaned, water cannot flow away from them properly, resulting in more significant damage than if there are no gutters.
Finally, damaged gutters can cause water to collect along your roof, resulting in even more damage.
By regulating water runoff, gutters can prevent erosion and divert water. This safeguards any landscaping surrounding a property, though naturally, the problem might be less severe if there is no landscaping.
You can pair gutters with gutter guards to keep debris out of the gutters. This keeps the gutters free of dirt that could clog them up and render them ineffective. Gutter guards also help prevent fires in the home.
Gutter installation safety precautions
Gutter installation necessitates numerous trips up and down ladders, which is risky. Among the safety measures to take into consideration are the following:
- Ensure the locks on an extension ladder are correctly engaged before climbing.
- Keep three points of contact with the ladder when ascending or working on it. Typically, your legs make up the first two points, and one of your hands makes up the third. Use a harness around your waist to keep hold of the ladder and the roof if you need to use both hands while working.
- Always have someone keeping an eye on you on the ground. This spotter can also support the ladder when it is not standing on solid ground.
- Verify that the ladder can handle your weight and the weight of the supplies and equipment you’ll carry. Ensure the ladder is rated to support your weight in addition to the weight of the gutters and tools.
- If you need to work from the roof, ensure the roof is sturdy enough to support your weight. For instance, when mounting the roof straps, this is necessary. Verify the strength of the roof’s structure by looking at the parts underneath it.
- The ladder’s topmost rung shouldn’t be used. You’d be better off obtaining a different ladder if the one you have needs to be taller to operate on your roof without using the topmost rung.
- You should only set up a ladder on a side slope with up to 6 degrees or a slope of more than 16 degrees with additional safety measures. This is due to the high likelihood of slipping from the ladder.
- To further stabilize the ladder, tie the stiles to a solid location on the roof. These will prevent you from falling if the ladder’s legs start sliding off.
- A dirty or wet roof should not be climbed. Your risks of sliding and falling off the roof are increased by dirt and moisture. Use a harness if you have to work on a roof like that.
- Always check that the ladder’s rungs are horizontal while installing gutters on a multi-story building and placing the ladder on the roof of the bottom floor. You may require ladder leveling tools.
By practicing these factors, you can be sure that the person using the ladder will always be safe. Work from the ladder instead of the roof because it is safer.